
Unraveling the CSS Conundrum: Why Your Divi Product and Event Listings Turn Blue (And How to Correct It)
If you’re a Divi user, you may have encountered a puzzling phenomenon where your meticulously designed product and event listings inexplicably take on an unexpected shade of blue. While this may seem like a vexing mystery, fear not, for the culprit behind this curious color transformation is none other than a CSS issue lurking within your Divi theme. In this guide, we’ll delve into the root cause of this phenomenon and provide you with a simple solution to restore your listings to their intended appearance.
Understanding the CSS Quirk: What Causes the Blue Secondary Menu and Details?
The sudden appearance of a blue tint on your product and event listings in Divi can be attributed to a CSS glitch that arises under certain circumstances. When specific configurations or modifications are applied within the Divi Theme Customiser, it can inadvertently trigger unintended stylistic changes, resulting in the unwelcome presence of the colour blue.
How to Correct the CSS Conundrum: A Step-by-Step Guide
Now that we’ve identified the source of the issue, let’s proceed with rectifying it. Follow these step-by-step instructions to banish the blue from your listings and return them to their rightful appearance:
1. Access the Divi Theme Customiser (Very Important!)
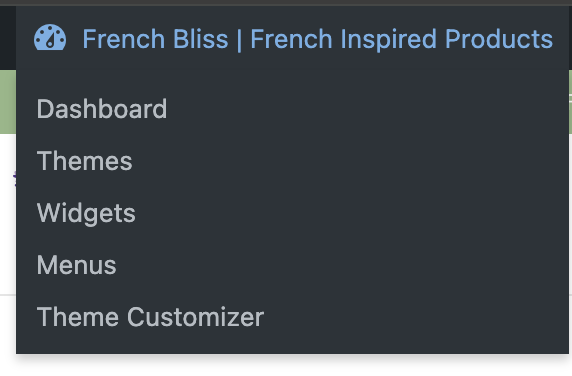
Begin by logging into your WordPress dashboard and navigating to the Divi Theme Customiser. Hover over the top-left corner of the screen to reveal the customisation options, then select “Theme Customiser” from the dropdown menu.
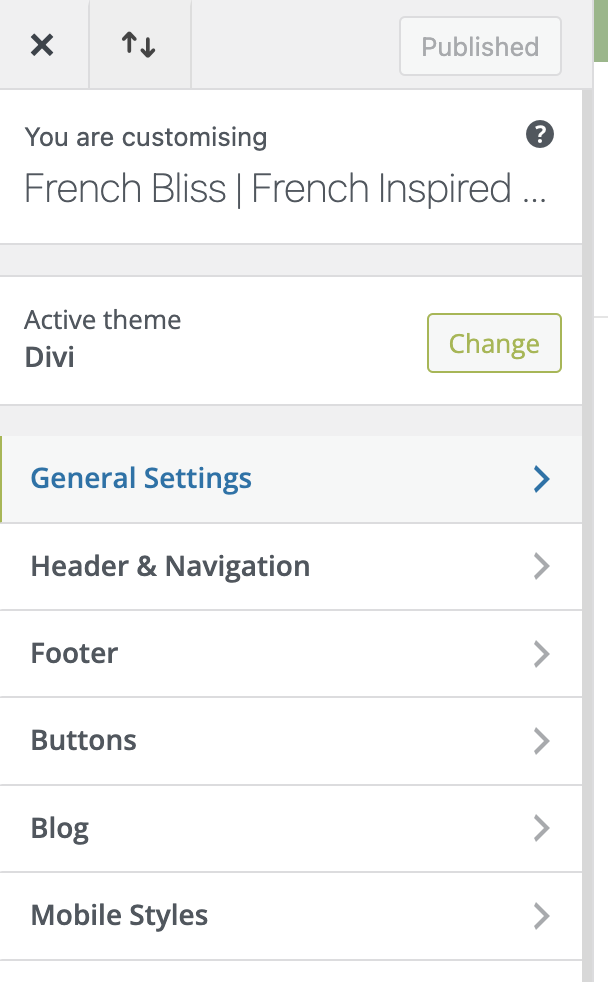
2. Navigate to the Header & Navigation Settings
Within the Divi Theme Customiser, locate the “Header & Navigation” settings. This section contains options related to your website’s header and primary menu bar configuration.
3. Make a Minor Adjustment
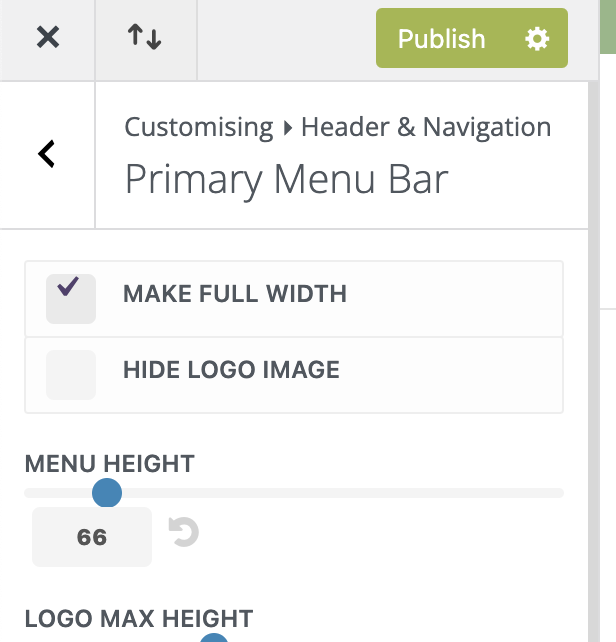
To trigger a refresh and override the unintended styling, make a minor adjustment within the Header & Navigation settings. For example, you can toggle the “Make Full Width” option by unticking and then ticking it again.
4. Publish Your Changes
Once you’ve made the adjustment, click on the “Publish” button to save your changes and apply them to your website. This step ensures that the modifications take effect and overwrite the erroneous CSS styling applied to your product and event listings.
5. Return to Normal Operations
After publishing your changes, exit the Divi Theme Customiser and carry on with your website management tasks as usual. With the CSS issue corrected, your product and event listings should now be free from the unwanted blue details.
Mastering CSS Management in Divi
In the world of website customisation, encountering CSS quirks and glitches is par for the course. However, armed with the knowledge and simple fix outlined in this guide, you can swiftly overcome such challenges and maintain the aesthetic integrity of your Divi-powered website. Remember, even minor adjustments within the Divi Theme Customiser can have a significant impact on your site’s appearance, so approach CSS management with confidence and creativity as you continue to customise and refine your online presence.